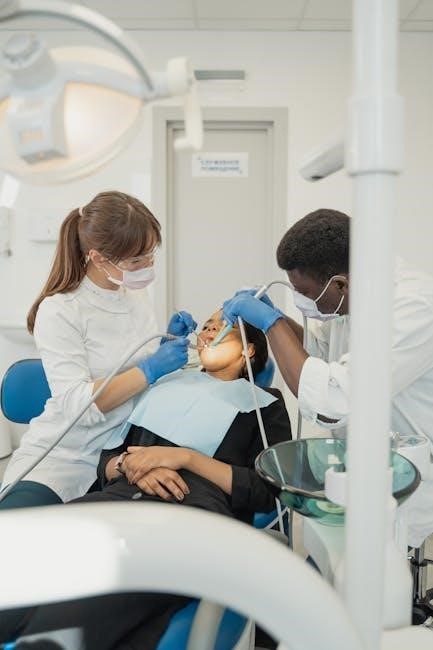
Proper dental assistant tray setup is crucial for efficiency, patient safety, and infection control, serving as a foundational skill for successful dental procedures and workflow.
1.1 Importance of Proper Tray Setup
Proper dental tray setup ensures efficiency, organization, and infection control, minimizing procedure delays. It prevents contamination, maintains sterility, and guarantees all necessary instruments are readily available. A well-organized tray enhances patient safety and streamlines workflow, allowing dental assistants to focus on assisting the dentist effectively. This foundational step is critical for successful outcomes in all dental procedures.
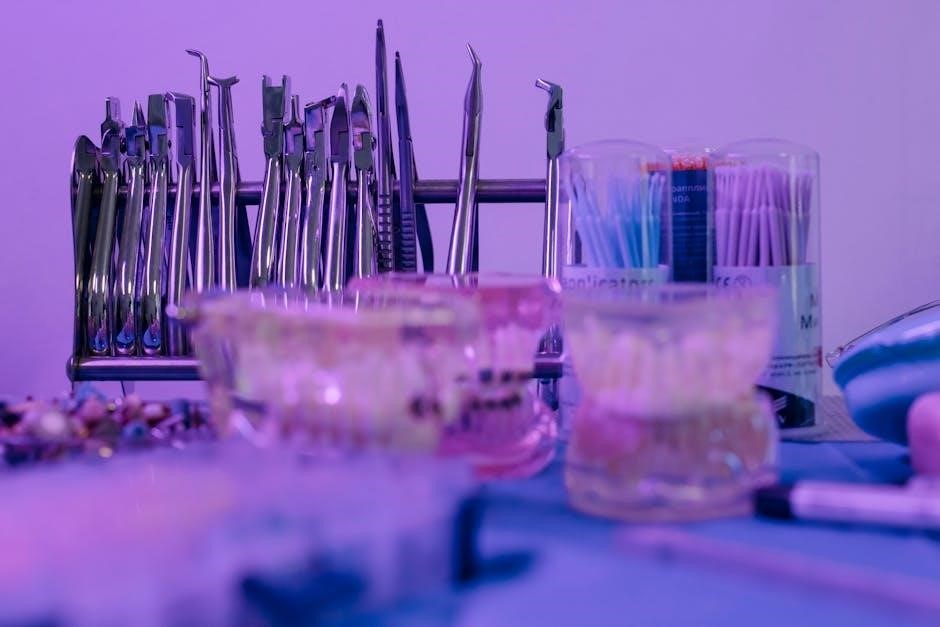
1.2 Basic Components of a Dental Tray
A dental tray typically includes essential instruments, such as mirrors, scalers, and excavators, along with supplies like cotton rolls, gauze, and anesthesia. Organization tools, such as separators or compartments, help maintain order. The tray may also contain procedure-specific items, ensuring everything needed for the treatment is within easy reach, promoting efficiency and streamlined workflow during dental procedures.
Sterilization and Infection Control in Tray Setup
Sterilization and infection control are critical in tray setup, ensuring all instruments are properly disinfected and organized to prevent contamination and maintain efficiency during procedures.
2.1 Sterilization Procedures for Instruments
Sterilization procedures involve thorough hand washing, donning PPE, and using autoclaves or chemical vapor sterilization. Instruments are wrapped in pouches or bags, ensuring proper packaging for effective sterilization. After sterilization, instruments are organized by procedure in sealed trays or bags to maintain sterility and efficiency during dental procedures. This step is crucial for infection control and patient safety.
2.2 Organizing Sterilized Instruments by Procedure
Sterilized instruments are organized into trays based on the specific procedure, such as prophylaxis or operative trays. Each tray is designed with raised edges to prevent instrument slippage. Instruments are grouped by function, ensuring easy accessibility during procedures. This systematic arrangement enhances efficiency and reduces delays, allowing dental assistants to maintain a seamless workflow and focus on patient care.
Basic Tray Setup for Common Procedures
Basic tray setups vary by procedure, such as prophylaxis, scaling, or operative tasks, ensuring essential instruments are organized and easily accessible during treatment.
3.1 Prophylaxis (Prophy) Tray Setup
A Prophy tray setup includes essential instruments for dental cleaning, such as an ultrasonic scaler, hand instruments (e.g., 5th generation sonic scaler), suction, and polishing paste. This basic setup ensures efficiency and organization, allowing dental assistants to access tools quickly during routine cleanings.
3.2 Scaling and Root Planing (SRP) Tray Setup
The SRP tray setup includes ultrasonic scalers, hand instruments, and local anesthetic for deeper cleaning. Key components are a periodontal probe, Gracey curettes, and a syringe for anesthesia. This setup ensures dental assistants are prepared for thorough plaque removal and gum treatment, maintaining organization and efficiency during the procedure.
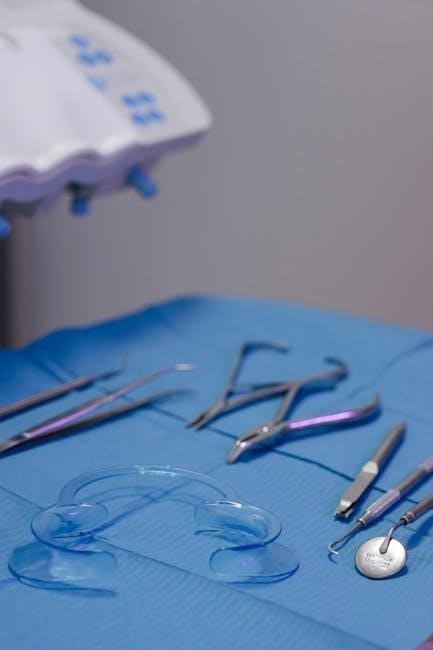
Operative and Crown Preparation Tray Setup
Essential instruments include high-speed handpieces, burs, and composite materials for restorations. Crown prep setups require specific burs and impression materials, ensuring efficient workflow during procedures.
4.1 Instruments and Supplies for Operative Procedures
Essential items include high-speed handpieces, composite resin, curing lights, and impression materials. Specific burs like H135Q and H135UF are used for finishing. Matrix bands, adhesive, and resin are also included. The tray setup ensures all necessary tools are organized for efficient restorative procedures, adhering to the dentist’s preferences and the procedure’s requirements for optimal patient care and precision.
4.2 Crown Prep Tray Setup and Organization
A crown prep tray should include high-speed handpieces, composite resins, curing lights, and shade selection kits. Specific materials like IPS e.max copings and OptiBond Solo are essential. Instruments are typically placed on one side, with restorative materials on the other. The tray is organized to streamline the procedure, ensuring all items are easily accessible. This setup aligns with dental standards and enhances efficiency during crown preparations.
Impression Tray Setup
Selecting the right impression tray ensures accuracy and fit, while proper preparation involves securing it firmly to prevent movement during the procedure for precise dental impressions.
5.1 Selecting the Right Impression Tray
Selecting the right impression tray is essential for accurate dental impressions. Considerations include patient mouth size, impression type (partial or full), and material compatibility. Stock trays, available in various sizes, are commonly used. Custom trays offer a precise fit but may require additional time. Features like raised edges prevent slipping. Proper fit ensures patient comfort and accurate impression results. Always choose a tray that suits the procedure and patient needs.
5.2 Preparing the Impression Tray for Use
Preparing the impression tray involves sterilization, applying adhesive if necessary, and ensuring proper fit. Sterilize the tray using autoclave or cold sterilization methods. Apply tray adhesive to enhance retention of impression material. Check tray size against the patient’s mouth to ensure comfort and accuracy. Organize impression material and syringes nearby. Proper preparation ensures precise impressions, reducing retakes and improving patient satisfaction.
Suture Tray Setup
The suture tray setup is crucial for surgical procedures, including essential items like suture, needle, 2×2 gauze, and cotton rolls. These tools help maintain hemostasis and patient comfort.
6.1 Essential Items for Suture Procedures
The suture tray must include suture material, needles, 2×2 gauze, cotton rolls, and scalpel for precise incisions. These items ensure effective hemostasis and proper wound closure, maintaining patient comfort and procedural efficiency.
6.2 Organizing the Suture Tray
Organize the suture tray by placing suture material and needle in easy-to-reach spots, with gauze and cotton rolls nearby for absorbency. Position the scalpel securely to prevent accidental cuts. This setup ensures quick access, reduces procedural delays, and maintains a clean, infection-controlled environment, enhancing overall surgical efficiency and patient safety during suturing processes.
Orthodontic Tray Setup
Orthodontic tray setup involves organizing specific instruments like Q-Finisher and ultra-fine finishing instruments for precise adjustments. Include ligature cutters and distal end cutters for efficient archwire adjustments, ensuring tools are within easy reach to streamline procedures and maintain infection control.
7.1 Specific Instruments for Orthodontic Procedures
Orthodontic procedures require specific instruments like Q-Finisher for final adjustments and ultra-fine finishing instruments for precision. Include ligature cutters and distal end cutters for archwire adjustments. These tools ensure efficient workflow and maintain infection control. Proper organization of these instruments in the tray is essential for quick access during procedures, streamlining the process and enhancing patient care.
7.2 Step-by-Step Guide to Orthodontic Tray Preparation
Begin by reviewing the patient’s chart to determine the procedure. Gather and sterilize all necessary instruments, organizing them by type. Place ligature cutters and archwire cutters on one side for easy access. Include elastomeric ligatures and archwire in separate compartments. Ensure all tools are within reach to streamline the process. Restock supplies post-procedure for efficiency.
Pediatric Tray Setup
Tailored for young patients, pediatric trays include child-friendly instruments and supplies, ensuring efficiency and accessibility while addressing specific needs for primary teeth and nervous children.
8.1 Instruments and Supplies for Pediatric Procedures
Pediatric trays include smaller dental instruments like pediatric mirrors, explorer tips, and primary tooth extractors. Supplies such as flavored prophy paste, small suction tools, and bite blocks are essential. These items are selected to ensure comfort and accessibility for young patients, making procedures less intimidating while maintaining efficiency.
8.2 Tailoring the Tray for Young Patients
Tailoring the tray for pediatric procedures involves selecting appropriately sized instruments and organizing them to minimize intimidation. Using child-friendly terminology and arranging tools in an accessible manner can reduce anxiety. Incorporating visual distractions, like colorful trays or themed supplies, helps create a positive experience. This customization ensures efficiency while prioritizing the child’s comfort and cooperation during dental care.
Customizing Tray Setup for Dentist Preferences
Customizing tray setups aligns with individual dentist preferences, enhancing efficiency and organization. This ensures preparedness for various procedures while maintaining a seamless workflow.
9.1 Adapting to Individual Dentist Requirements
Dental assistants must tailor tray setups to meet specific dentist preferences, ensuring efficiency and organization. This customization may include arranging instruments in a particular order, adding specific supplies, or modifying the layout based on the dentist’s workflow. Adapting to these preferences enhances procedural flow and supports the dentist’s unique approach to patient care.
9.2 Flexibility in Tray Organization
Tray organization must be flexible to accommodate various dental procedures and dentist preferences. This adaptability ensures instruments are readily accessible, streamlining workflows. Customizing tray layouts for specific procedures or preferences enhances efficiency and patient care. Flexibility in setup allows dental assistants to prioritize essential tools, maintaining order and productivity during diverse clinical scenarios.
Maintaining Efficiency During Procedures
Maintaining efficiency during procedures involves organizing instruments for quick access, minimizing unnecessary movement, and ensuring a clean workspace. Streamlining workflow reduces delays and enhances patient care.
10.1 Time Management Tips for Dental Assistants
Efficient time management is achieved by organizing instruments, anticipating the dentist’s needs, and minimizing distractions. Preparing trays in advance and sterilizing instruments promptly ensures smooth workflow. Streamlining setup processes and maintaining a clean workspace also saves valuable time, allowing dental assistants to focus on patient care and procedural efficiency.
10.2 Ensuring Instrument Accessibility
To ensure instrument accessibility, organize trays logically, grouping similar tools together. Use raised-edge trays to prevent instruments from slipping. Place frequently used items at the front for easy reach. Labeling or color-coding can enhance visibility. Maintaining a clean, uncluttered workspace also improves efficiency, allowing quick access during procedures and reducing delays.
- Store instruments in logical groups.
- Position high-use items at the front.
- Use trays with raised edges to prevent slipping.
Post-Operative Instructions and Cleanup
Provide clear post-operative instructions to patients for recovery and oral care. Ensure proper disposal of used materials and sterilization of instruments after procedures to maintain hygiene standards.
11.1 Providing Patient Care Instructions
After procedures, dental assistants should provide clear, personalized post-operative instructions to patients. This includes explaining oral hygiene practices, dietary restrictions, pain management, and follow-up care. Ensuring patients understand their recovery process helps promote healing and satisfaction. Tailor instructions to individual needs and offer written guidelines for reference. Effective communication enhances patient compliance and overall treatment outcomes.
11.2 Proper Disposal and Sterilization After Use
After procedures, dental assistants must dispose of biohazardous materials in designated containers and sterilize reusable instruments. Sharps are placed in puncture-proof containers, while disposable items are sealed in biohazard bags. Instruments are cleaned, bagged, and autoclaved for sterilization. Proper disposal and sterilization prevent infection transmission and maintain a safe environment, adhering to OSHA and dental hygiene standards;
Proper dental tray setup ensures efficiency, safety, and infection control. Mastery enhances patient care and workflow. For further learning, refer to recommended guides and tutorials available online.
12.1 Summary of Key Points
Mastering dental tray setup enhances efficiency, patient safety, and infection control. Proper organization of instruments and supplies is essential for smooth procedures. Customization to dentist preferences and maintaining instrument accessibility are critical. Post-operative care instructions and proper disposal of materials ensure patient well-being. Utilize online guides, tutorials, and resources for continuous learning and skill improvement in dental assisting.
12.2 Recommended Guides and Tutorials for Further Learning
Explore online tutorials, such as the A4DAs dental assistant series, for step-by-step tray setup guidance. Utilize interactive exercises on the Evolve companion website for hands-on practice. Refer to detailed PDF guides and videos for procedure-specific setups. Engage with forums and professional communities for shared tips and resources. Continuous learning through these tools ensures mastery of dental assisting skills and stays updated on best practices.
Related Posts

hone guide
Honing guides are invaluable tools for achieving consistent, precise sharpening…
what is chase at class action guide
A class action lawsuit allows a group of individuals with…